You dream of a pristine green lawn but the daily watering routine feels like a drain? The solution may be setting up a sprinkler system. Installing a DIY sprinkler system might seem like a task reserved for professionals, but with some Expert guidance from Frontdoor, it's entirely possible. With the right plan in hand, you can transform your lawn into a lush, thriving oasis.
Plan your sprinkler system installation
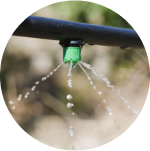
Begin by taking a walk around your yard and noting different areas: where does the sun hit the hardest, where does shade linger, are there slopes or flat expanses? These observations will guide you in choosing the right sprinkler heads and designing an efficient layout.
![]()
Safety Tip: Always check with your local utility line locator service before digging. The nationwide number to call for underground markouts is 811 on your phone.

- Make sure you don’t have too many heads on any one zone.
- Install a bypass shut-off and a hose bibb so you can blow it out with a compressor in the winter to avoid freezing, if necessary.
- Always check direction of the flow on the zone valves.
- Make sure you only use approved pressure fittings and pipe.
- If you're hooking up to the main water line to the house, you will need to install a check valve to prevent back-flow (always consult with local ordinances, as back-flow prevention tends to vary by region).
Need help getting started with your sprinkler system? Video chat a Frontdoor Expert.
Assess your lawn
Every lawn has its own personality, shaped by sun, shade, and soil. Observe your garden's different areas at various times of the day. Notice where the sun shines the longest and where shadows linger. These observations are crucial as they dictate the type of sprinkler heads required for each zone of your lawn.
You’ll also want to consider the contours and slope of your land. Elevation changes can affect water pressure and distribution, so keep this in mind when planning.
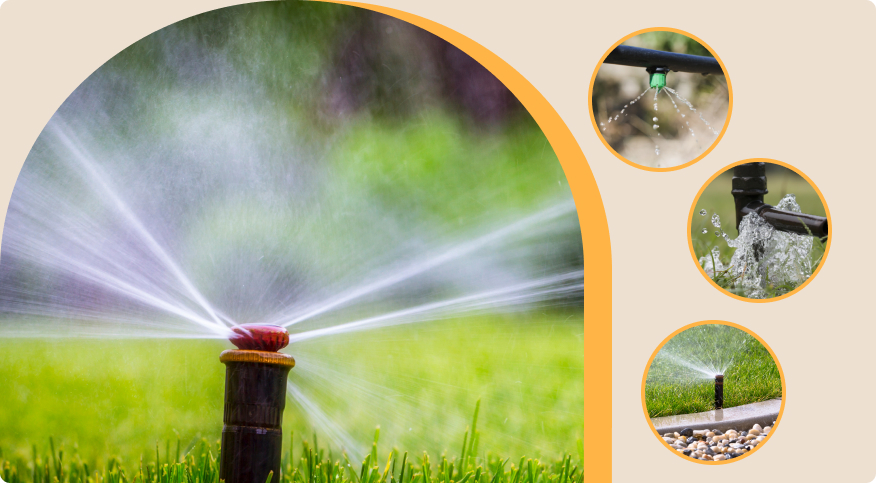
Choose the right sprinkler heads
When it comes to hydrating your lawn, not all sprinkler heads are created equal; some distribute water in a full circle, some a half circle, and some a quarter or three-quarter circle.
The choice of sprinkler heads can make or break the effectiveness of your irrigation system. Here’s what you need to know about the different types of sprinkler heads:
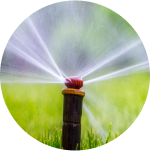
Spray Heads
Ideal for small to medium areas, such as residential lawns and garden beds. These heads provide a fixed spray pattern and are best suited for flat terrains. When installing spray heads, ensure they are spaced 10 to 15 feet apart to achieve uniform water coverage. They are most effective in zones where plants require similar amounts of water.
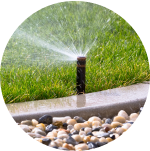
Rotor Heads
These are suitable for larger, open areas due to their ability to cover more ground with adjustable, rotating streams. Rotor heads can be spaced 15 to 45 feet apart, making them a smart choice for big, expansive lawns. They work well on varied terrains and are particularly effective for watering large sections of grass without wasting water on pavements or non-grass areas.
Drip Irrigation
The go-to for gardens, hedges, and densely planted areas. Drip systems deliver water directly to the soil at a slow rate, minimizing evaporation and runoff. They are perfect for targeting specific plants or rows in a vegetable garden, ensuring each plant receives just the right amount of water at its roots. When planning a drip irrigation system, consider the spacing between plants and use drip emitters or soaker hoses accordingly.
Bubbler Heads
These are used for concentrated watering, such as at the base of trees or in flower pots. Bubblers allow for a large amount of water to soak directly into the ground, reaching deep root systems without overspray or water waste. They are particularly useful for newly planted trees or shrubs requiring deep, consistent watering. To ensure optimal performance, consider investing in a cheap water pressure gauge. By monitoring water pressure levels, they can adjust the flow rate accordingly, ensuring that the bubbler heads deliver the right amount of water for specific areas.
Designing the layout
Now, it's time to put pen to paper and sketch your yard's layout. Mark the locations of trees, gardens, and pathways. Then, draw where you imagine the sprinkler heads going, keeping in mind the range and spray pattern of each type. Your goal is to cover every part of your lawn without overlap that could lead to overwatering.
When planning, consider the water pressure and flow rate from your main supply. These factors influence how many sprinkler heads you can run simultaneously. If you're unsure, consult with a Frontdoor Expert to help clarify these technical details.

Materials and tools
When you're ready to start installing your sprinkler system, having the right materials and tools on hand is essential. Here’s a comprehensive list to guide your preparation:
Materials:
- PVC or Polyethylene Pipes: choose based on your local climate and soil condition.
- Sprinkler Heads: a mixture of spray, rotor, and bubbler heads as per your lawn’s requirement (it’s always good to call your local ordinance to double check specific requirements).
- Valves: for controlling the flow of water to different zones.
- Backflow Preventer: to prevent contaminated water from flowing back into the clean water supply.
- Controller: the brain of your sprinkler system, allowing you to set watering times and durations.
- Fittings and Connectors: various sizes to connect pipes and sprinkler heads.
- Teflon Tape: for sealing threaded connections to prevent leaks.
- Wire and Waterproof Connectors: for connecting the controller to the valves.
Tools:
- Trenching Shovel or a Trencher: for digging trenches for your pipes.
- Pipe Cutter: for cutting PVC or polyethylene pipes to the required lengths.
- Sod Cutter (Optional): for removing grass more cleanly where you’ll lay pipes.
- Spade or Garden Hoe: for manual digging and soil moving.
- Screwdrivers and Wrenches: for assembling and securing system components.
- PVC Cement and Primer (if using PVC pipes): for creating watertight seals between pipe joints.
Installing the sprinkler system
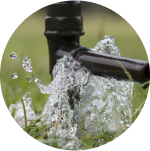
Begin by following the route of your sprinkler system per your plan outline. Use spray paint or flags to mark the path of your trenches, following the layout with precision. And as always, video chat a Frontdoor Expert if you’re looking for help as you install your sprinkler system.
![]()
Safety Tip: Call before you dig! Contact your local utility companies or the national "Call Before You Dig" service to have any underground utlitiy lines marked. This process, which should be completed a few days before your planned start, ensures that your landscaping ambitions don’t lead to unintended disruptions or dangers.
Laying out the pipes
Digging trenches is the next step—a trenching shovel or a powered trencher can be your best tools. Aim for a depth that complies with local guidelines, usually around 8-12 inches, to safeguard against freezing and ensure optimal performance.
As you place the pipes along these freshly carved paths, the network of your sprinkler system will start to take shape. Where turns or branches are necessary, cut the pipes to size, and secure them with the appropriate fittings. Before these veins of your garden are covered, a test run is essential. Connect the pipes to the water source and inspect the layout for any leaks, making adjustments as needed to ensure a seamless flow.
Install sprinkler heads
With the arteries of your system laid out, it's time to install the sprinkler heads—the critical endpoints that will deliver water to your lawn.
- Position the Heads: place sprinkler heads at the designated spots along your pipe layout. If you're using risers, make sure they're of the correct height so that the sprinkler heads will be level with the soil surface.
- Secure the Heads: attach the sprinkler heads to the pipes or risers. Make sure they are firmly in place but do not overtighten, as this can damage the heads or threads.
- Adjust for Coverage: once installed, adjust the spray patterns and ranges according to your lawn’s needs. This ensures even coverage and prevents overwatering or dry spots.
Connect the water supply
-
1
Install the Backflow Preventer
Attach the backflow preventer to your main water line. This device is crucial for keeping your drinking water safe from contamination.
-
2
Connect the Valves
Install the control valves near your water source, following the manufacturer’s instructions. These valves will allow you to control the flow of water to different zones of your sprinkler system.
-
3
Link to the Controller
Run the control wires from the valves to the sprinkler controller. Make sure each valve is connected to the corresponding zone in the controller for easy management.
Setting up the control system
Setting up the control system of your sprinkler system efficiently can make a significant difference in the health of your lawn and the conservation of water.
Start by familiarizing yourself with your sprinkler controller's manual. Each model is different, but they all serve the same purpose: to allow you to automate when and how much your lawn is watered. Understand the features available, such as multiple program settings, rain delays, and seasonal adjustments.
Then, you’ll want to program your watering schedule. Here are some quick tips:
-
1
Zone Setup
Assign each section of your lawn to a zone in the controller. And remember, the size of each zone isn't just about the area's characteristics; it's also dependent on water pressure and flow rate. Each zone should correspond to areas with similar watering needs, taking into account factors like sun exposure, plant type, and soil condition. By factoring in water pressure and flow rate when determining zone size, you can ensure that each area receives adequate water coverage without overtaxing your system or causing uneven watering.
-
2
Watering Times
Set specific watering times for each zone. Typically, it's best to water your lawn early in the morning or late in the evening when temperatures are cooler to reduce evaporation.
-
3
Frequency
Adjust the frequency of watering based on seasonal changes, type of grass, and current weather conditions. Remember, overwatering can be as harmful as under-watering.
-
4
Seasonal Adjustments
Utilize the seasonal adjustment feature to increase or decrease the overall watering duration based on the time of year and local weather patterns. This can usually be done without changing the individual program settings.
If your sprinkler system is equipped with smart technology, take advantage of mobile apps that allow you to control and monitor your system from anywhere. They’re particularly useful for making real-time adjustments and monitoring water usage.
Level up your lawn game with Sunday
Integrating smart technology and sustainable practices in lawn maintenance has never been easier with our Frontdoor + Sunday Lawn Care partnership. Sunday Lawn Care is revolutionizing how to approach gardens, using climate and satellite data to tailor custom care plans delivered directly to your door.
As a Frontdoor member, you receive an exclusive 25% off Sunday’s comprehensive lawn care plans, ensuring your lawn gets exactly what it needs, precisely when it needs it, without the environmental toll of traditional methods.
Together, Frontdoor and Sunday Lawn Care are setting new standards for modern, eco-conscious lawn maintenance, making it simpler and more sustainable for homeowners to enjoy lush, healthy, and vibrant lawns.

25% Off discount only applies to ‘Annual Custom Lawn Care Plans’ and not ‘Pay as you Grow’ Plans or other à la carte purchases. Discount not eligible for returning customers or for plan renewals.
Was this article helpful?