Sliding patio doors are a great way to bring the outdoors indoors. Here’s a step-by-step guide on how to remove a sliding glass door and how to install a sliding glass door.
Installing a patio door is a great way to freshen up the look of your home, bring in more natural light and provide better insulation year-round. Replacing glass sliding doors of the same size takes a bit of skill, some experience, a little muscle and a few power tools.
If you feel confident and have someone who’s able to give you a hand, then this is a project you can handle.
It takes two.
There are two panels. One that stays put and one that slides. Since both are big and heavy, replacing sliding patio doors is a two-person job.
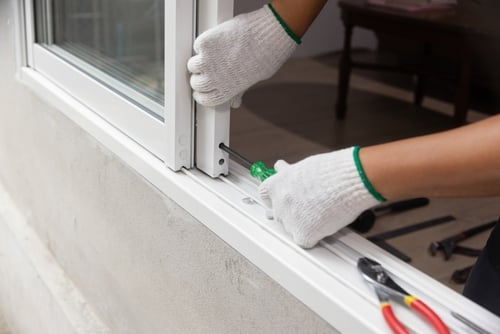
Detach the stationary panel.
- You should find brackets at the top and bottom of the inside of the door.
- Remove them with a screwdriver.
- Tilt the door inward—use a little force if you need to—and carefully remove the door.
Remove the sliding panel.
- Once you have the stationary panel out of the way, put your screwdriver in the roller adjuster hole at the base of both sides of the door.
- Turn the screws counterclockwise to move the door down as close to the track as you can so you have some wiggle room between the two tracks.
- Then work with your partner to lift and push the door off its track and remove it.
Disconnect the outside trim.
- The exterior trim goes around both the interior and exterior door frame.
- Carefully pry it off without damaging your siding or interior wall.
- If the trim looks good, put it aside so you can re-use it.
Loosen the frame.
- For this step, you’ll need to use a pry bar or reciprocating saw to cut through sealant, nails and shims. Pull out any nails you can see before you start
Loosen the threshold.
- Unscrew the threshold and use a pry bar to loosen the caulk under the sill plate. Tilt the threshold back and forth if you need to.
Remove the frame.
- Working with your partner, tilt the frame toward the outside of the house and pull it away from the top, sides, and threshold. The frame should come out in one piece.
Take a good look around.
- Now is a good time to check for any wood rot around the frame. And make sure the threshold and sides are level so you can prepare shims during installation if you need to.
Cover that big hole in your house.
- If you’re not going to be prepping and replacing the sliding glass doors right away, attach some tarp with painter’s tape or put up some plywood to protect the inside of your house.
- Otherwise, go on to the next step.
Now it’s time to put up the new door.
Install waterproof flashing.
- Head to your local hardware or home improvement store for a roll of waterproof flashing tape for windows and doors.
- Fold the tape over the edges of the floor sill, covering it entirely.
- Run the tape all the way around the rough opening—including the sides and top where the door frame will sit.
Caulk the frame and sill.
- Buy some interior/exterior waterproof silicone caulk.
- Run a line of caulk inside your new door's flange surrounding the door frame.
- Then run two lines of caulk on the sill.
Attach the frame along the nail flange.
You and your partner now need to line up the door outside your home and tilt it in place, making sure the base of the frame adheres to the caulk on the sill. The caulk of the flange should press into the sides and top of the rough opening.
- While one of you holds the door in place, the other should make sure the door is plumb.
- Place a level on the top of the door and on the surface of the door itself to check that it’s upright and level.
- You may need to add shims under the sill or along the side of the frame before you place the last screw.
- Keep the shims and level in place while you screw into the pre-cut holes along the frame. Use your reciprocating saw to make the shims flush with the house.
Install the panel.
Your instruction manual will tell you how to place the sliding and stationary doors in the track. It should just be a case of tipping each panel into place and screwing in the brackets and the strip of wood at the top of the frame that keeps the door from slipping off-track.
Take it for a test slide.
Test your door by sliding it back and forth to see if it lines up with the locking mechanism. You can raise or lower the roller adjusters with a small screw at the base of the door.
Seal it up.
- Seal the interior and exterior seams between the door frame and the opening with a line of expanding foam insulation or a strip of foam insulation cut to size.
- Close up the area with silicone caulk. If the old trim is in good shape, re-attach it to the door frame with a nail gun.
- If not, use a circular saw to cut new pieces.
Now you know how to remove sliding glass doors and how to install sliding glass doors. So you can keep bringing the outside in.
Replacing sliding glass doors is a two-person job. So before you start, make sure you ask someone to come over and help. For other household projects, help is as easy as downloading the Frontdoor® app. It lets you pick up a wide range of helpful DIY tips or have one of our friendly Experts talk you through it.
It’s all about helping you stay in control of your to-do list and keep the small things from turning into bigger ones. We’re here to make it easier to prevent problems instead of reacting to them. We help you gain the confidence and satisfaction that come with staying on top of your home’s health.
Was this article helpful?


