If it’s been a while since you painted inside your home, you may be ready to freshen things up this spring. You may also have forgotten how tedious rolling and brushing can be. But painting walls and ceilings doesn’t have to be difficult drudgery. Not if you follow a few simple painting tips. Starting with…
Using the right tools.
Having the right home painting supplies can make the difference between an all-day chore and an efficient use of your time. The people who paint for a living have a particular set of tools because they know what works best. And now you can too.
Extend yourself.
Professional painting tools can make painting a room easier, faster, and even safer. First, leave the step ladder in the closet and buy an extension pole. The pros use them to reach high on walls and paint ceilings. You can buy one that springs open with the push of a button and extends up to 30 feet. Just attach the roller cage to the pole and you’re good to go…higher.
Away with the tray.
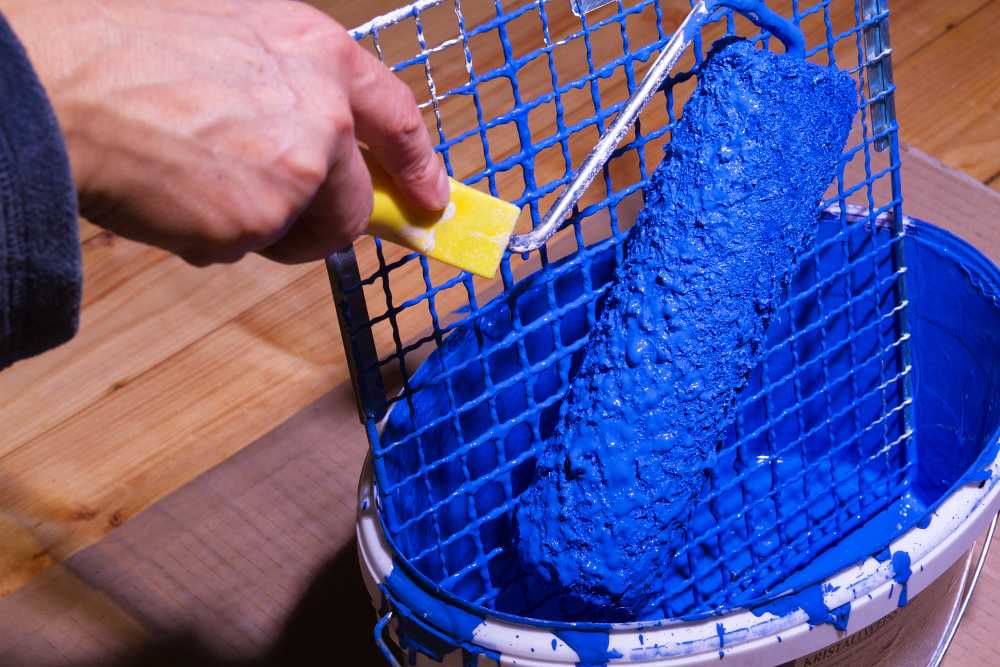
You’ve always done it this way: Pour the paint a little at a time into the flimsy plastic paint tray. It’s time to get a bucket grid. Available in one-to-five-gallon versions, the grid hangs vertically into the bucket. You just dip your roller, roll it across the grid, and paint.
Rack ‘em up.
Stack racks let you paint one side of a door, then flip it over without touching it. With these ingenious little triangular-shaped racks, you can stack freshly painted doors to dry, or put a two-by-four between a pair of them to rack up trim or small cupboard doors.
Get a grip.
You use drop cloths to protect your floors. But no matter how carefully you lay them out, constantly walking across them bunches them up and moves them around. Swap them out for ones with tacky, grippy surfaces that stay where you put them.
Roll with it.
Nobody likes trying to clean paint rollers. Chances are, you usually just toss them and grab a fresh one next time. It’s time you got a professional roller cleaner. Some attach to a power drill so you can spin the roller while washing it; others attach to a hose so you can power-wash the roller. Either option is better than what you’ve been doing.
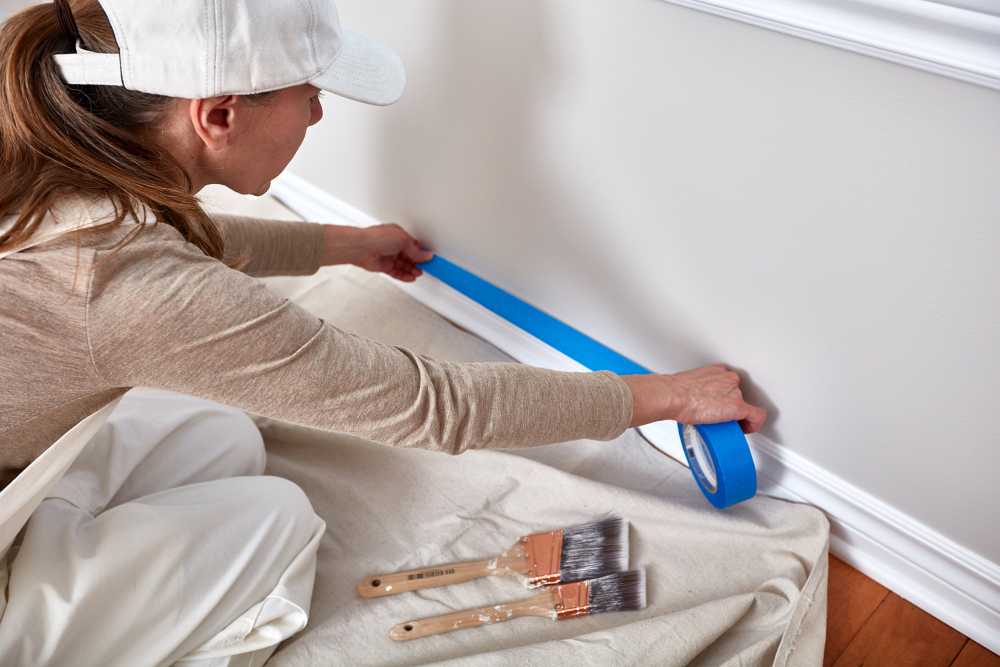
Make masking less taxing and more exacting.
Buy high-quality painter’s tape and use a mini hand masker to stick down a straight, even line for your trim and around your ceiling. Set a few inches by hand, then let the masker press the tape into the surface. You can even mask off baseboards quickly and easily with a tool that applies the paper and tape at the same time.
Bring the heat.
Stop using caustic chemicals to strip paint from trim. Infrared heat strippers soften old paint safely, without kicking out lead fumes or dust. Soften the paint, then take it off with a sharp scraper.
Now let’s get rolling.
Now that you have the tools the pros use, you’re good to go, right? Well, not quite. You could still use some tips to make sure you do the job as professionally—and painlessly—as possible.
Here are a few steps to brush up on before you get rolling.
Before you open the can, have a plan.
One of the most important tips for painting a room is looking at the big picture. How do you want the room to look…what about creating a bold accent wall…do you want the moldings to stand out? Could the ceiling use a refresh? Instead of walling yourself in, be creative.

Which hues to use?
Before you pick the actual color, decide whether you want to go warm or cool, natural or saturated. Then grab a few swatches and place them on the wall—make sure to check them at different times during the day.
Tool up.
In addition to the pro-style gear we’ve recommended, don’t forget quality rollers and brushes, sandpaper, putty knife, and spackling.
Do the math.
Save yourself an extra trip to the store to buy or return paint. Figure on using a gallon for about every 400 square feet you’ll be covering (two coats). If you’re taking a room from dark to light, plan for a third coat. And to be safe, err on the side of buying too much paint so you’re not skimping to stretch the supply.
Don’t skip the prep step.
To save the furniture—and a little aggravation—take it out of the room, or at least move it to the middle, away from the walls and cover it. Run painter’s tape along the edges of the room’s corners, base and crown moldings, and door and window casings, making sure you get a good seal. Pop off the switch and outlet covers. Fill holes and repair any damaged drywall.
Stir things up.
Use one of those paint sticks you grabbed at the paint counter and mix the paint—both before you start and a few times while you’re painting to make sure your color is consistent. If you’re using more than a gallon, pour the paint into a large bucket.
Where to begin?
You’re ready to roll. Almost. Start by knowing where to begin. Work from the top down—ceiling first, then the upper parts of the walls. If you’re creating an accent wall, save it for last. The bold color will cover up any lighter paint that bleeds onto that surface. Paint one wall at a time, using a brush to cut in the paint along the molding and the corners. Roll using long strokes in a series of W patterns to avoid roller marks.
Air it out.
Got the first coat on? Great. If you want to reduce the wait, ventilate. Open the windows and run a fan or two to speed up the drying process.
Clean it up.
The room looks great. It’s time to bask in the glory of a job well done. Well, not quite. You’ve got to pull up the painter’s tape, fold up the drop cloths, and clean up any drops or dribbles of paint that snuck onto the floor or anywhere else they weren’t supposed to. Then it’s off to the basement to clean off the roller covers and brushes and store any remaining paint.
At Frontdoor, we know you love getting things done around the house. Staying in control of your to-do list is easier when you can keep the small things from turning into bigger—and more expensive—ones. We’re here to make it easier to prevent problems by staying on top of your home’s health, instead of reacting to them when it’s too late.
Want to learn more about home maintenance and repair? Download the app if you haven’t already, and chat with a helpful, friendly Frontdoor Expert.
Frontdoor assumes no responsibility, and specifically disclaims all liability, for your use of any and all information contained herein.
Was this article helpful?