Some Simple Steps to Give You More Control and Convenience.
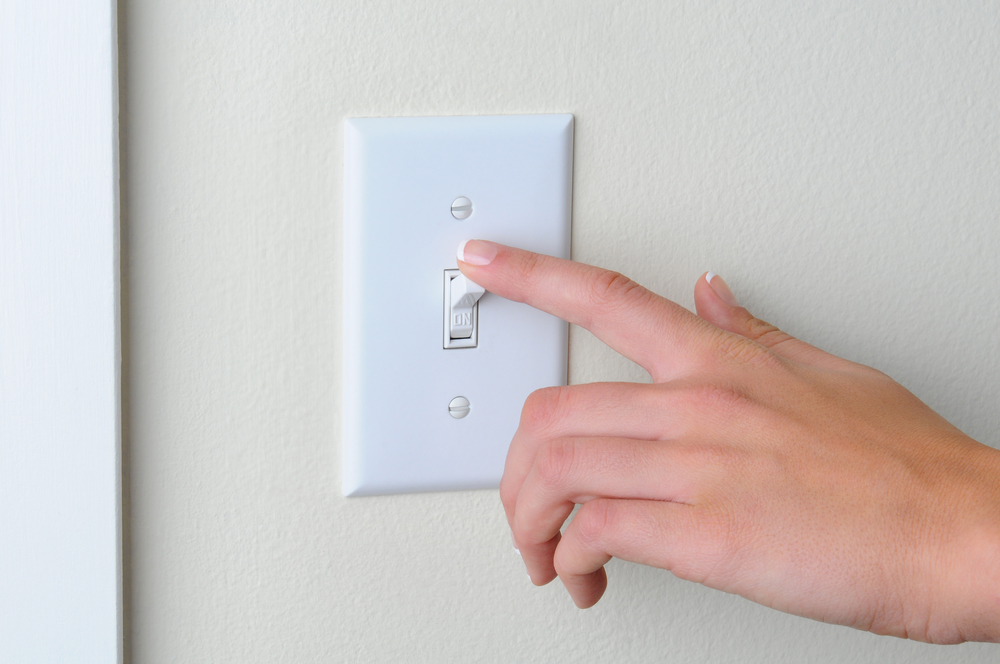
What Is A 3-Way Switch, and What Is 3-Way Switch Wiring?
A three-way switch lets you control lights or other electrical fixtures from two different locations. For instance at the top and bottom of a stairway or next to doors in a room with two entry points.
How Does It Work?
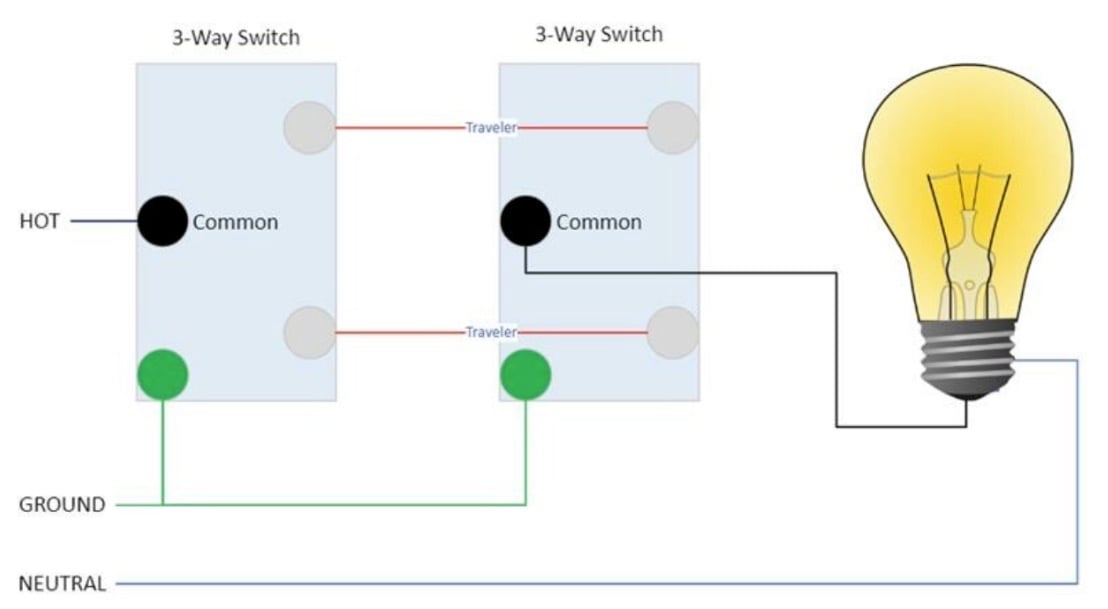
While you usually can’t tell the difference by just looking at a regular switch and a three-way switch, most three-way switches use three screw terminals—one common and two “travelers”—plus a ground terminal for safety.
A single-pole switch, the typical switch that turns on a light or fixture from a single location, only uses two.
The switch works by establishing or breaking the electrical circuit through either of the two traveler wires. The power source connects to the common terminal of one switch, while the light or other fixture attaches to the common terminal of the second switch. The two traveler wires run between the switches, linking both traveler terminals.
When both switches are in the same position, the circuit completes, and the light goes on.
Toggling one switch changes the current’s path, breaking the circuit and switching off the light. Flipping the other switch will either re-establish or interrupt the circuit. The term “three-way” refers to the three possible paths the electrical current can take—through the first traveler wire, the second traveler wire, or remaining off.
3-Way Switch Wiring Made Simple.
John Stapleton is a licensed master electrician with over 35 years of experience in the electrical industry—and one of our trusted Frontdoor Experts. John put together the following steps to help guide you through replacing an existing GFCI receptacle.
Let’s start by collecting a few basic tools:
- Philips head screwdriver
- Straight tip screwdriver
- Non-contact voltage tester
- Insulated wire stripper/pliers
- Electrical tape
- 3-way switch
There’s More Than One Way to Wire a Three-Way Switch. Here’s One We Recommend.
Step 1: Power Off and Double-Check.
Turn off the circuit breaker for the switch you want to replace. To make sure the circuit is off, use the straight-tip screwdriver to remove the faceplate for the switch. Set the plate and screws to the side.
Then use the non-contact voltage tester on the wires going to the switch. Place the tester on each switch terminal while it’s still in the electrical box. If there’s still power, go back and try to shut off the power again. If you’ve verified the power is off, you’re good to move on to the next step.
Step 2: Pull Out the Old Switch.
Loosen the screws to the switch with the Phillips head screwdriver. Once you’ve removed the screws, slowly pull out the switch, being careful not to touch the screw terminals. Even though you’ve made sure the power is off, it’s always a good idea to be extra cautious any time you’re working with or around electricity.
You’re not quite ready to remove the wires from the terminals. Snap a photo of the old switch for reference, then get the new three-way switch ready.
Step 3: Swap the Wires.
On both the new and old switches, there are three terminals plus a fourth—the green ground terminal. You should see two copper screws and one black screw. Do a one-for-one swap; loosen the black screw terminal on the old switch and attach it the same way on the new switch. Wrap the wire hook around clockwise and tighten the terminal screw. Then repeat the same procedure with the wires attached to the copper screw terminals, swapping them from the old switch to the new.
Once you’ve done that, move the bare wire from the green ground screw on the old switch to the new switch. Wrap electrical tape around the switch and terminals to help minimize the chance of short circuits.
Step 4: Finish the Job.
Carefully put the switch back into the switch box and attach it with the screws that came with it, then put the faceplate back on. While you’re at it, have the plate screws line up either horizontally or vertically for a professional look. Now you can turn the circuit back on and make sure your new three-way switch is working. Now you know how to wire a 3-way switch.
A Simple 3-Way Switch Wiring Diagram, made by Frontdoor Expert Electrician James Thrash:
3-Way Switch Wiring FAQs:
Q: Can a three-way switch work the same as a regular switch?
A: Yes. If you want to wire a three-way switch as a single-pole, just make sure you wire it to the right two contacts.
Q: What happens when a three-way switch isn’t wired correctly?
A: When a three-way switch is wired wrong, the light will only work from one location.
How to Add a Dimmer in Place of a Three-Way Switch.
Whether you want to control the amount of light in a room or just save a little energy, it’s fairly simple to install a dimmer when you wire a three-way switch.
- First, make sure you buy a 3-way dimmer—and dimmable light bulbs.
- Then pick the switch you want to convert.
- Remove the faceplate with a straight-tip screwdriver.
- Cut power by turning off the appropriate breaker.
- Use your non-contact voltage tester on all three wires connected to the existing 3-way switch to make sure power is off.
- Using a #2 Phillips-head screwdriver, loosen the screws that attach the switch to the device box.
- Once the switch is removed, note and mark which wire is on the black terminal and which two wires are on the copper terminals.
- Loosen the three terminals and remove the wires.
- Install those wires directly onto the dimmer switch terminals using the same color coding as the old 3-way switch.
- Install the dimmer back into the device box and put the faceplate back in place.
- Turn the breaker back on and test to make sure that the lights turn off and on at both locations.
- Now you can dim the lights in the room!
3-way switch wiring is one of those little projects that can make a big difference. At Frontdoor®, we‘re here to help you with the small things and the big ones. So download the app if you haven’t already, and schedule a video chat with a friendly, helpful Frontdoor Expert today!
Was this article helpful?