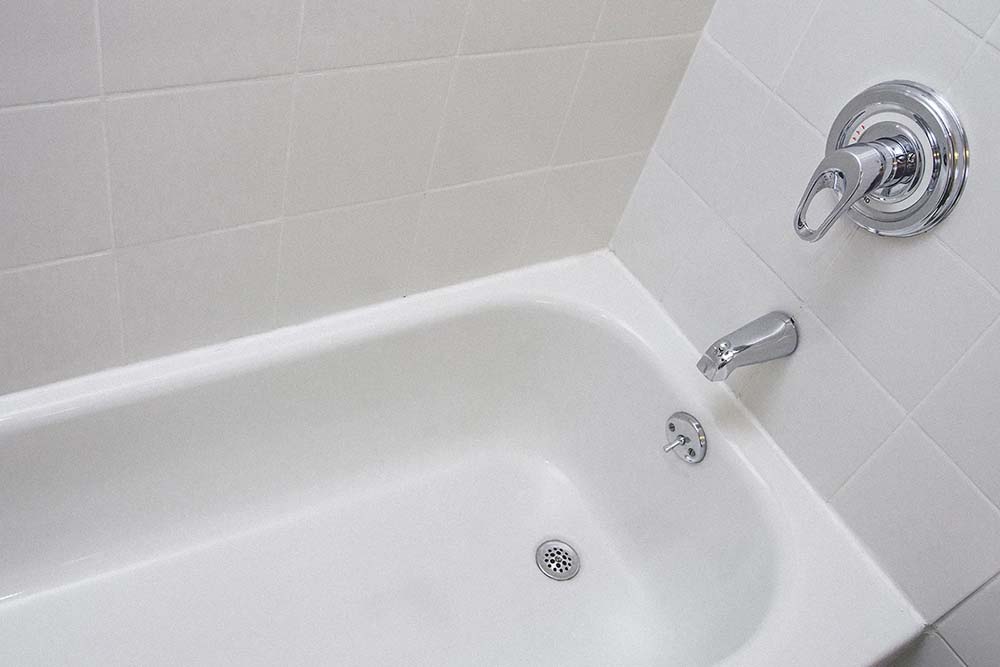
If you have a crack, a chip, or even a hole in your bathtub, shower pan, or bathroom tile, you don’t need to perform a full bathroom remodel in order to fix it. You can fix many cracks, chips, and holes in porcelain, fiberglass, and acrylic showers and tubs yourself, using a simple kit, and save hundreds or thousands of dollars in remodeling costs.
And that’s good news, because replacing a bathtub or shower is rarely just replacing a bathtub or shower. When you start replacing one fixture, other, nearby fixtures are affected, too, and the next thing you know, you need a new toilet, and new vanity and sink, maybe even new tile floors. When you repair or refinish your bathtub or shower, the bathtub remains in place, so you don’t have to risk toppling that first domino and setting in motion a chain reaction of repairs that turns into a full bathroom remodel.
So, before you start getting quotes for a bathtub or shower replacement, read these tips for how to repair a bathtub or shower. You could save a ton of money, and still get a nice, shiny, new (looking) bathtub or shower. Plus, repairing cracks or holes in your bathtub or shower pan could help prevent water damage and mold growth that can occur when moisture leaks through that damage to the floors or wall underneath your bath or shower.
1. Use The Right Repair Kit
Chips and small cracks in your bathtub are easy to repair using a two-component epoxy bathtub repair kit from your local hardware store. The key to successful DIY shower or tub repair is to make sure you’re using the right repair or refinishing kit for your tub or shower surface. Do you know whether you have a fiberglass, acrylic, porcelain, enamel, or ceramic tub or shower? Well, it’s important, because different surfaces are going to require different types of epoxy. There are epoxy repair kits available for porcelain, enamel, ceramic, acrylic, and fiberglass bathtubs. They also come in various shades of white and cream to match common bathroom fixtures, so choose a kit that matches your tub or shower.
2. Don’t Skimp On Prep
It’s imperative that you clean the surface to be repaired thoroughly and carefully before you apply the epoxy. If you’re just repairing a chip, a crack, or even a small hole, you don’t need to clean the whole tub or shower, but you should clean off the area you’re repairing. Wash away soap scum and other residue with an abrasive cleaner like Barkeepers Friend, sand the area as appropriate, and then clean it again with cotton swabs and rubbing alcohol to remove any remaining grime or residue.
3. Be Careful With The Sandpaper
Before you repair or refinish a tub or shower, you need to sand the area where you’re applying the patching or refinishing compound, so that the patch or new finish can take hold. But if you’re patching, be careful not to sand outside of the crack or hole you’ll be filling. You could easily scratch the surface of the tub, and then you’ll need to patch that, too.
4. Apply The Patch
The two-component epoxy kit you buy for your tub or shower repair will come with instructions for mixing and applying the epoxy. Usually, you need to mix the two components together in a mixing tray with a small stirring stick. Some kits come with a tray and stick, but if yours doesn’t, use a small disposable tray and a toothpick, craft stick, matchstick, or other small disposable stick. Set the tray down on something to mix it, and protect the surface from spills with a piece of cardboard.
Use a small spatula, craft stick, toothpick, or other tool to smooth the mixed epoxy into the crack, chip, or hole. Fill the damaged area, adding thin layers of epoxy one at a time and smoothing them in one direction. It’s easier to add small amounts of epoxy in thin layers than to remove excess, so be careful not to use too much.
5. Let The Patch Dry
Once you have applied the patch, let it dry for the length of time recommended on the package. Some kits require just a few hours of drying time, while others need to dry for a full 24 hours. Once the patch is dry, sand it gently with 400- or 600-grit sandpaper, until it feels as smooth as the rest of the tub or shower’s finish. If you can still feel the presence of the chip or crack after sanding, that means your patch didn’t quite fill the damage. That’s no big deal -- you can repeat the process to apply a second layer of epoxy and fill out the patch. Otherwise, you may go ahead and use the tub or shower.
Ready to take the next step in home ownership? Frontdoor® offers a variety of ways to get things done. Whether you prefer connecting via video chat with trade industry Experts, receiving a list of vetted Pros for repairs, or utilizing our how-to library to DIY, we've got you covered.
With Frontdoor, completing tasks has never been easier, so why wait? Open the Frontdoor and start taking control of your home repairs.
Was this article helpful?


