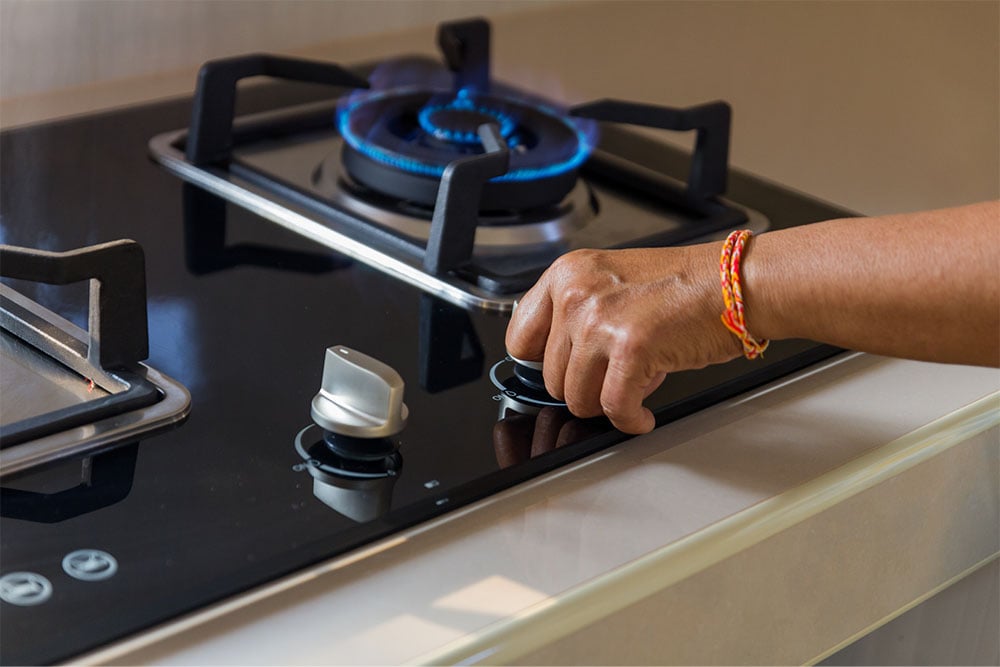
It finally happened. You're in your kitchen whipping up a snack and your gas stove starts misbehaving. Maybe the burner's flame is uneven, or it’s taking a tad longer to light. Knowing the basics of how your gas stove works and what the telltale signs of trouble are will help make sure the repairs go smoothly.
Get to Know Your Gas Stove
Gas stoves have been a mainstay in kitchens for generations because of their instant heat control and professional look and feel. But what exactly makes them tick? Before you dive into fixing your gas stove, you should take a little time to understand its components and signs of trouble.
Anatomy of a Gas Stove Burner
Knowing when to repair or replace gas burners should start with getting to know their anatomy and what those parts do. Here’s a breakdown of the most common gas burner components.
Burner Cap
This is the removable part that sits atop the burner base. It’s responsible for distributing gas evenly to create a consistent flame around the burner. The cap's design ensures that the flame is spread out evenly, providing uniform heating while you cook.
Burner Base
Sitting just below the burner cap, the burner base is where the gas and air mix before being ignited. The base also controls the flow and amount of gas, which directly affects the size and strength of the flame.
Igniter Switch
The igniter switch is located on the stem of the gas valve. When you turn the knob, it sends power to the igniter underneath the base cap.
Igniter
In most modern gas stoves, the igniter is an electrical component that produces a spark when you turn on the burner.
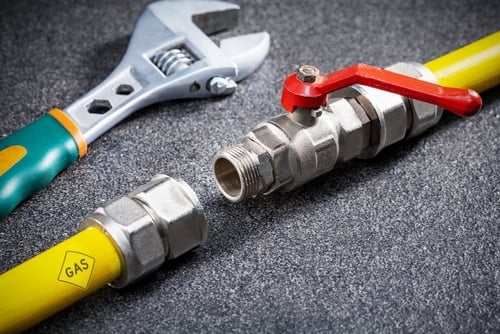
Gas Supply Line and Valve
The gas supply line connects your stove to the main gas line in your home, while the valve controls the flow of gas to each burner.
Regular cleaning and inspection can prevent many common problems, but normal wear and tear will still cause the occasional issue to pop up.
Common Problems & Symptoms
Recognizing the signs of malfunction in your gas stove burner can be the difference between a quick fix and a call for professional help. Here are some common problems and symptoms to watch out for:
- Weak or Irregular Flame: This could be due to a clogged burner base, where debris obstructs the gas flow, or it might indicate an issue with the gas supply itself.
- Uneven Flame: When the flame is higher on one side of the burner than the other, the culprit is often a misaligned or dirty burner cap.
- Yellow or Orange Flame: A healthy gas stove flame is typically blue with a small yellow tip. If the flame is predominantly yellow or orange, it could indicate incomplete combustion, often due to a dirty burner or an improper gas-to-air ratio. A humidifier can also cause a yellow or orange flame due to secondary air mixture.
- No Ignition: If you turn on your stove and hear the clicking of the igniter but see no flame, the igniter or igniter switch might be faulty, or there could be a problem with the gas supply. Sometimes, it’s as simple as the burner cap blocking the igniter.
- Delayed Ignition: When there’s a noticeable delay between turning on the burner and the flame igniting, it might be a sign of a dirty igniter or issues with the gas flow.
- Gas Smell: Smelling gas when the stove is off is a serious issue and should never be ignored. This could indicate a leak in the gas supply line and requires immediate attention from a professional.
Identifying these symptoms early can prevent more serious problems down the line. While some issues, like cleaning a dirty burner cap, are easy DIY fixes, others might require a deeper dive into the stove’s mechanics.
Diagnose & Repair Your Burner
Now that you know some common issues and their telltale signs, you should be more equipped to roll up your sleeves and start to troubleshoot and repair gas stove burners.
Safety First: Precautions Before You Start
Safety is a top priority with any repair or maintenance work. Gas stoves, while common, involve combustible materials that require careful handling. Here are some precautions to follow:
- Turn off the gas and unplug the unit from the power source
- Make sure the stove has cooled down
- Ensure good ventilation with open windows or a fan
- Keep a fire extinguisher nearby
- Know to stop if you start to smell gas or if the issue seems too complex
Taking these steps will ensure you’re set up for a successful and safe DIY repair.
Cleaning the Burner
Over time, food particles, grease and debris can clog the burner ports and affect performance, causing issues with the flame. Before you begin, gather your tools: a soft-bristle brush or toothbrush, a non-abrasive cloth or sponge, mild dish soap, a needle or paperclip, and a dry towel.
- Remove the burner cap and base: Gently lift off the burner cap and base. These are not usually fastened, so they should come off easily. If they are attached, proceed with caution. There may be gas lines and wires attached.
- Soak and scrub the burner cap and base: Using warm, soapy water, soak the components for about 15-20 minutes to loosen grime. Then, gently scrub them with your soft bristle brush or sponge.
- Unclog the ports: Use a needle or paperclip to gently clear out any clogs in the burner points. Gently blow through the ports to ensure they’re completely clear.
- Wipe down the stove surface: While burner components are drying, use a damp cloth to clean the surface around the burner.
- Dry and reassemble: Ensure all parts are completely dry before reassembling. Place the burner base back on the stove, followed by the burner cap, ensuring they’re properly aligned.
- Test the burner: The flame should be even and blue.
If you encounter any challenges or if the problem persists after cleaning, there are a few other things you can try.
Checking & Replacing the Igniter
If you hear a clicking sound when you try to turn on the burner, but it doesn’t ignite, the igniter might be dirty or misaligned. If there’s no clicking sound at all, it might be an electrical issue. Either way, you should take a close look for signs of wear, damage or buildup on the igniter. A dirty igniter can often be cleaned, but if it’s damaged, it will need replacing.
For this job, you’ll want to gather a screwdriver, a soft brush or cloth, and a new igniter if necessary.
- Turn off the gas and power: Make sure the gas supply and electrical power to the stove are turned off.
- Access the igniter: Depending on your stove model, you may need to remove the burner cap and base to access the igniter. Use your screwdriver to remove any covers or panels.
- Inspect and clean the igniter: Check for visible signs of dirt or damage. Gently clean it with a soft brush or cloth without using water or cleaning solutions.
- Test the igniter: If it still doesn’t work properly, it may need to be adjusted or replaced.
- Adjusting the igniter: Carefully adjust the position of the igniter so it’s closer to the burner, then test again.
If cleaning and adjusting doesn’t work, remove the old igniter and install a new one—making sure it’s properly aligned. Your manufacturer should have specific instructions for how to replace gas burner parts like the igniter, but if you need extra help or step-by-step guidance, a Frontdoor Expert is only a video chat away.
Troubleshooting Gas Supply Issues
We can’t stress this enough: troubleshooting gas supply issues is a delicate task and requires careful attention. If you start to smell gas, stop immediately.
- Visual inspection: Check the gas supply line for any obvious signs of damage, such as cracks, holes, wear or bends.
- Check connections: Ensure that connections between the gas line and the stove are secure. Gently tighten any loose fittings.
- Test with a soap solution: Mix a small amount of dish soap and water and apply a little to the connections on the gas line. Turn on the gas to pressurize the line, looking for bubbles forming along the connection. If bubbles appear, there is a leak.
- Check the gas valve: Make sure the gas valve is fully open to allow proper gas flow to the stove.
Gas supply issues can be complex and potentially dangerous. Remember, safety is always the top priority when dealing with gas appliances.
Know When to Call an Expert
Many gas stove issues can be resolved with a bit of DIY know-how, but sometimes calling in an Expert is the smartest—and safest—choice. You’ll likely need professional help if:
- The problem persists after your troubleshooting
- You smell gas and can’t locate and fix the source
- The repair involves more intricate parts of the stove, like internal gas lines or electrical components
- At any point you feel unsafe or unsure
Was this article helpful?