If you’re like a lot of homeowners, you may not have a lot of experience attempting electrical work around the house. We're here to help.
If you’re like a lot of homeowners, you have a fear of attempting any type of electrical work around the house. We're here to turn that fear into a healthy respect.
We’ve put together short step-by-step guides for a few simple electrical DIY projects to help you overcome your fear.
Get expert guidance for the trickier home electric projects. A Frontdoor Expert will video chat with you while you complete your own repairs.
Simple home electric fixes you can do yourself.
Get the hang of installing a light fixture.
When a ceiling fan or light fixture quits working or it’s just time for an update, you may find it’s harder to pick out the replacement than to swap them out. Follow these steps and you can handle it safely and efficiently:
- Go to the main circuit panel and shut off the power to the room you’ll be working in.
- Test the circuit with a voltage tester to ensure it is deenergized.
- Remove the fixture from the ceiling or wall.
- Detach the black, white (neutral), and ground wires. What color is the ground wire?
- Usually green, copper or silver.
- Attach the mounting bracket for the new fixture, following the manufacturer’s instructions.
- Connect the black, white, and ground wire—black to black, white to white, and ground to the mounting bracket—using the wire nuts that come with the new fixture.
- Put the rest of the light together.
- Switch the power back on and enjoy your new light fixture.
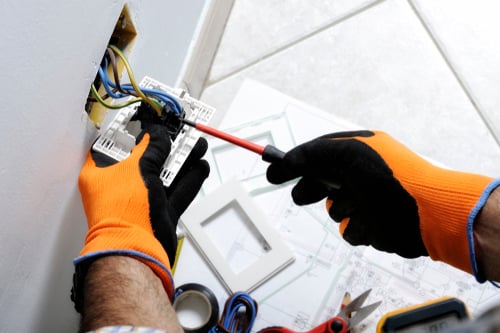
The ins and outs of replacing an electrical outlet.
If you have an outlet that’s no longer working, or just doesn’t hold a plug snugly, replacing it with a new one is shockingly simple:
- Turn off the power at the main circuit panel.
- Unscrew the face plate and remove it.
- Use a voltage tester to make sure the circuit is dead.
- Unscrew the receptacle and pull it and the electrical wiring from the box.
- Remove the black and white wires from the receptacle terminals.
- Remove the ground wire.
- Attach the black and white wires to the new receptacle.
- Attach the ground wire.
- Screw the receptacle back into the electrical box.
- Re-attach the face plate.
- Restore the power.
If you can do that, you can replace a light switch.
If you have a lamp or light fixture that’s flickering—and not the bulb or an issue with the power coming into the home—you probably have a bad light switch. You can follow the same steps as replacing an electrical outlet. Just make sure you buy the right type of switch—single, multiple and/or dimmer.
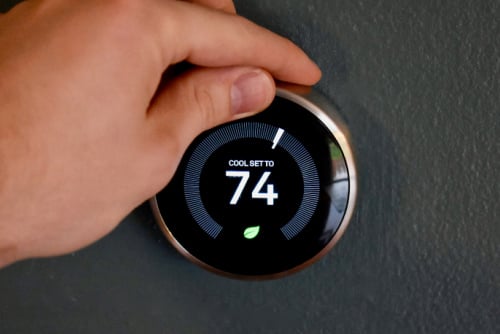
You don’t have to be an electric wiring genius to install a smart thermostat.
When it’s installed and used correctly, a smart thermostat that’s installed and operated correctly can save you up to 25 percent on your utility bills. You’ll need a slotted screwdriver, small Philips screwdriver, hammer, electric drill, a 3/16-inch bit and a couple of AA batteries.
1. Turn off the HVAC system.
Flip the breaker—or breakers—to cut power to the thermostat system and your furnace and avoid shorting out the electrical components of your system.
2. Pop off the faceplate.
This will give you access to the electrical wiring and the backplate. It should come off easily, although there might be a screw or two underneath. Snap a photo of the electric wiring with your phone so you know which lines connect to which terminals.
3. Take off the backplate.
First, remove the thermostat wires from the backplate. There may be small screws or tabs holding the wires in place. Then use a screwdriver to remove the screws attaching it to the wall.
4. Use the new backplate as a template.
Hold the new thermostat against the wall and mark the screw holes with a pencil. Then drill holes at the marks for the backplate screws. Pull the thermostat wires through the new backplate, then screw it into the wall.
5. Reconnect the wires.
Once you’ve attached the backplate, connect the thermostat wires to their corresponding terminals. Check the photo you took of the wiring on the old backplate if you need to.
6. The rest is a snap.
Once the wires are connected, snap the new thermostat’s faceplate onto the backplate. Don’t force it—you may need to push the wiring back into the wall first. Next, turn on the breaker for the HVAC system to boot up the smart thermostat. Connect the thermostat to your WiFi and start saving y on your utility bill.
If you’re not wired for doing home electric projects yourself, we’re here to walk you through it.
You can prepare for your video chat by making sure you have the tools and supplies you may need and setting aside enough time to complete the job. You’ll probably need an electrical tester, a few screwdrivers, a cordless drill, wire strippers, electrical pliers and, if you’re working on a light fixture, a good solid ladder (preferably fiberglass). Download the app to get started.
At Frontdoor, we know you love getting things done around the house. Staying in control of your to-do list is easier when you can keep the small things from turning into bigger—and more expensive—ones. We help you gain the confidence and satisfaction that come with staying on top of your home’s health.
Need help with an electrical project or need some DIY tips? Download the app if you haven’t already to chat with a qualified, friendly Frontdoor Expert.
Frontdoor assumes no responsibility, and specifically disclaims all liability, for your use of any and all information contained herein.
Was this article helpful?